Do you ever come across a task that should be straightforward yet it somehow takes an hour to figure out? Our office recently moved and I was asked to change the address and map on our Facebook page. No problem… sounds pretty simple. Although we spend a lot of time on Facebook pages, changing a business address is something that we rarely do. How hard can it be.. right?
Here’s how you think it should work
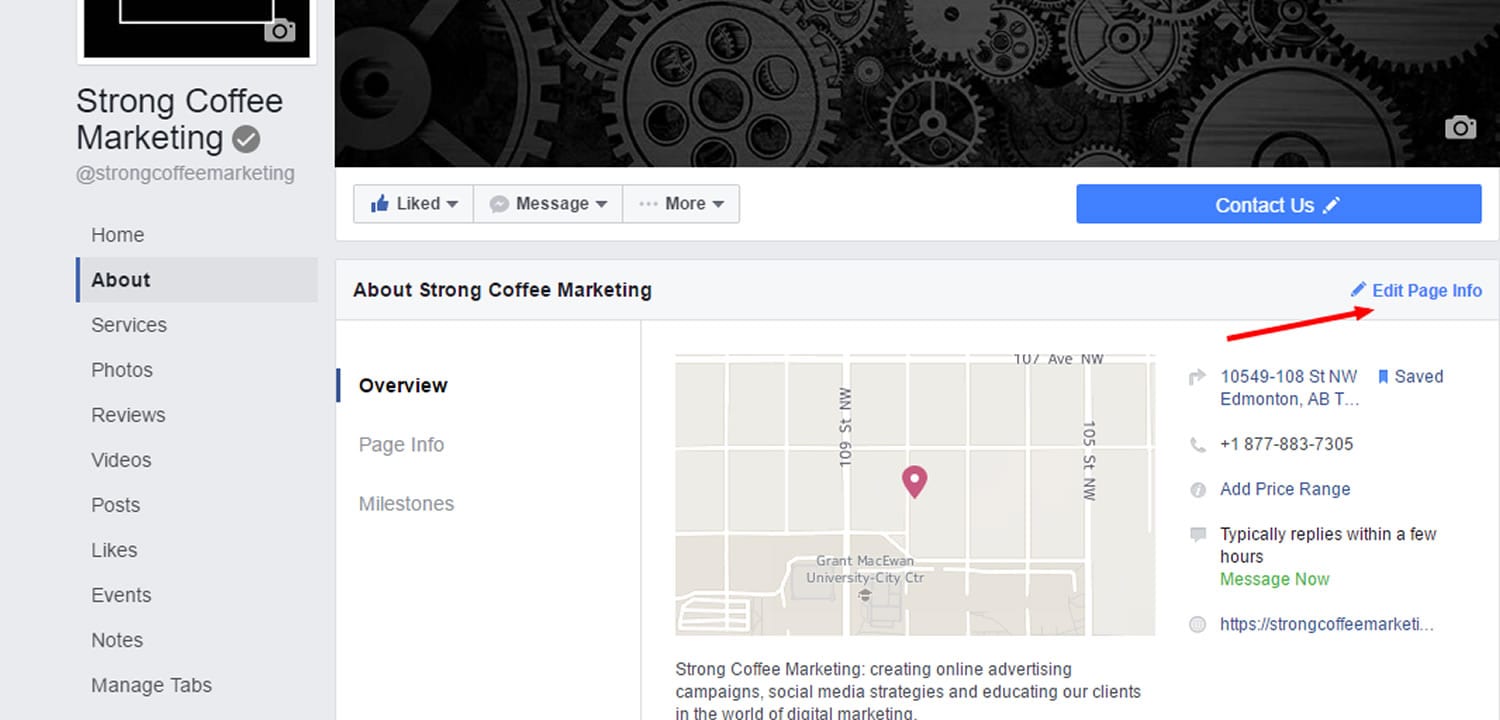
In a perfect world, you should simply navigate to the “About” section on the Facebook page using the left-hand navigation. This is where the map is located.
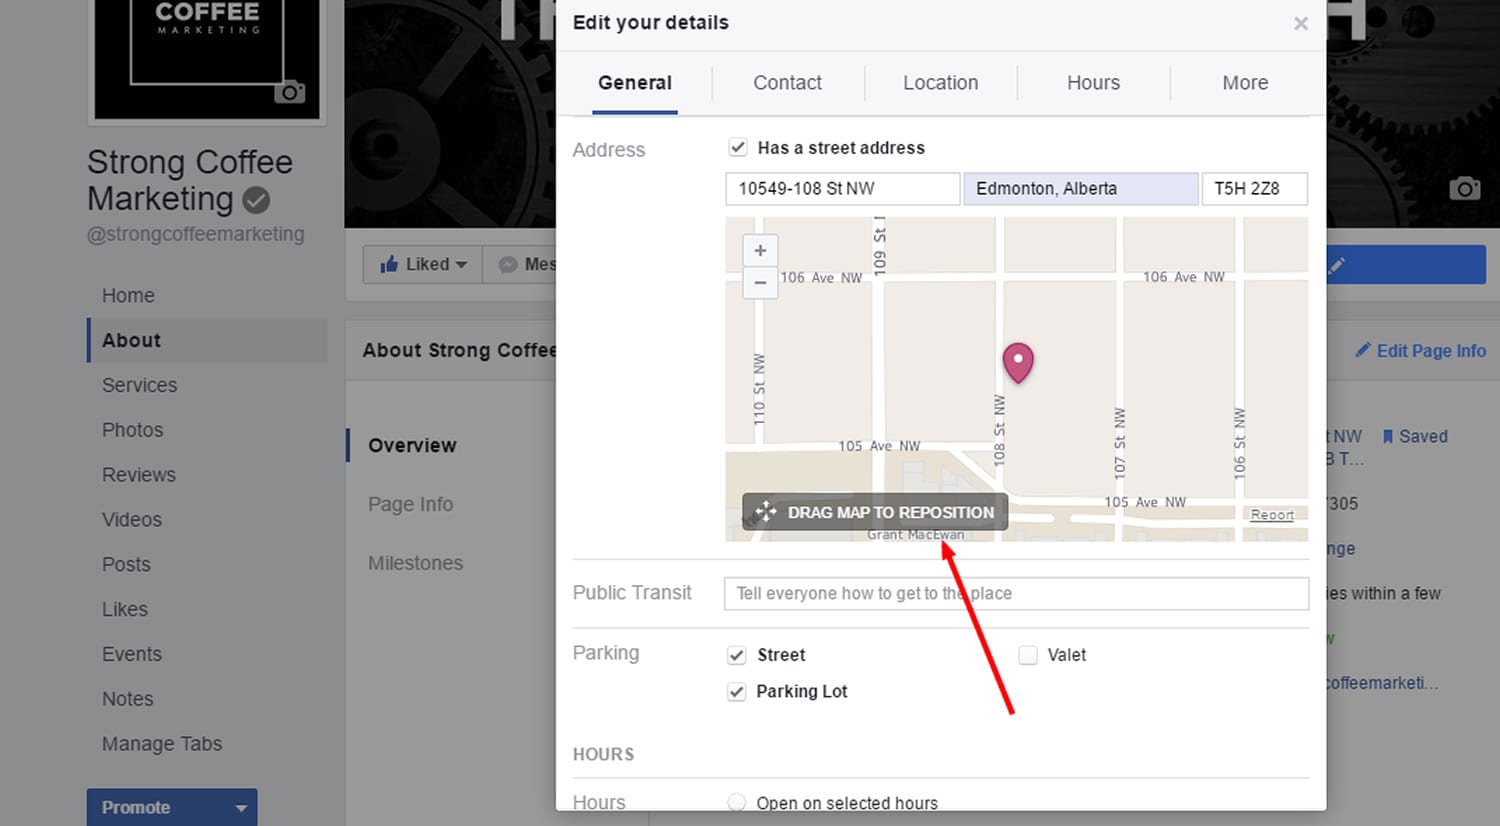
You should then just have to click on “Edit Page Info” on the top right and open a pop-up window.

You then should be able to follow the instructions that clearly say “Drag Map to Reposition” (it’s written right on the map). You should then just move the map pin to your desired location, click “Save Changes” and move on with your life.

One problem. When you go and look at your map again, the pin reverts back to the old location. You can follow the same procedure again and again if you want (hence the “it took me an hour to figure this out” part). And you’ll also have the map pin end up in the old location every time.
Here’s the workaround
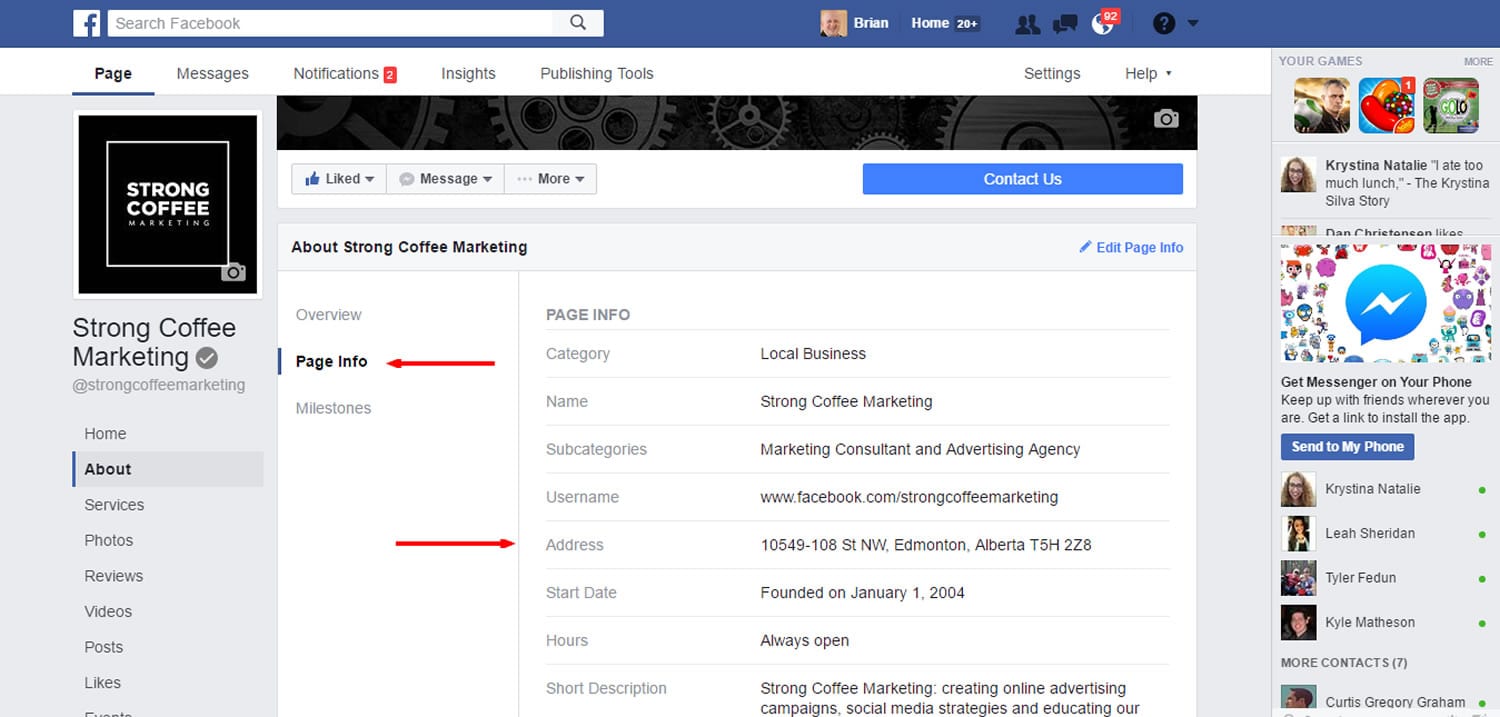
Instead of trying to fix the map on the About -> Overview tab, click through to About -> Page Info. Hover over your business address and click the “Edit” that appears.

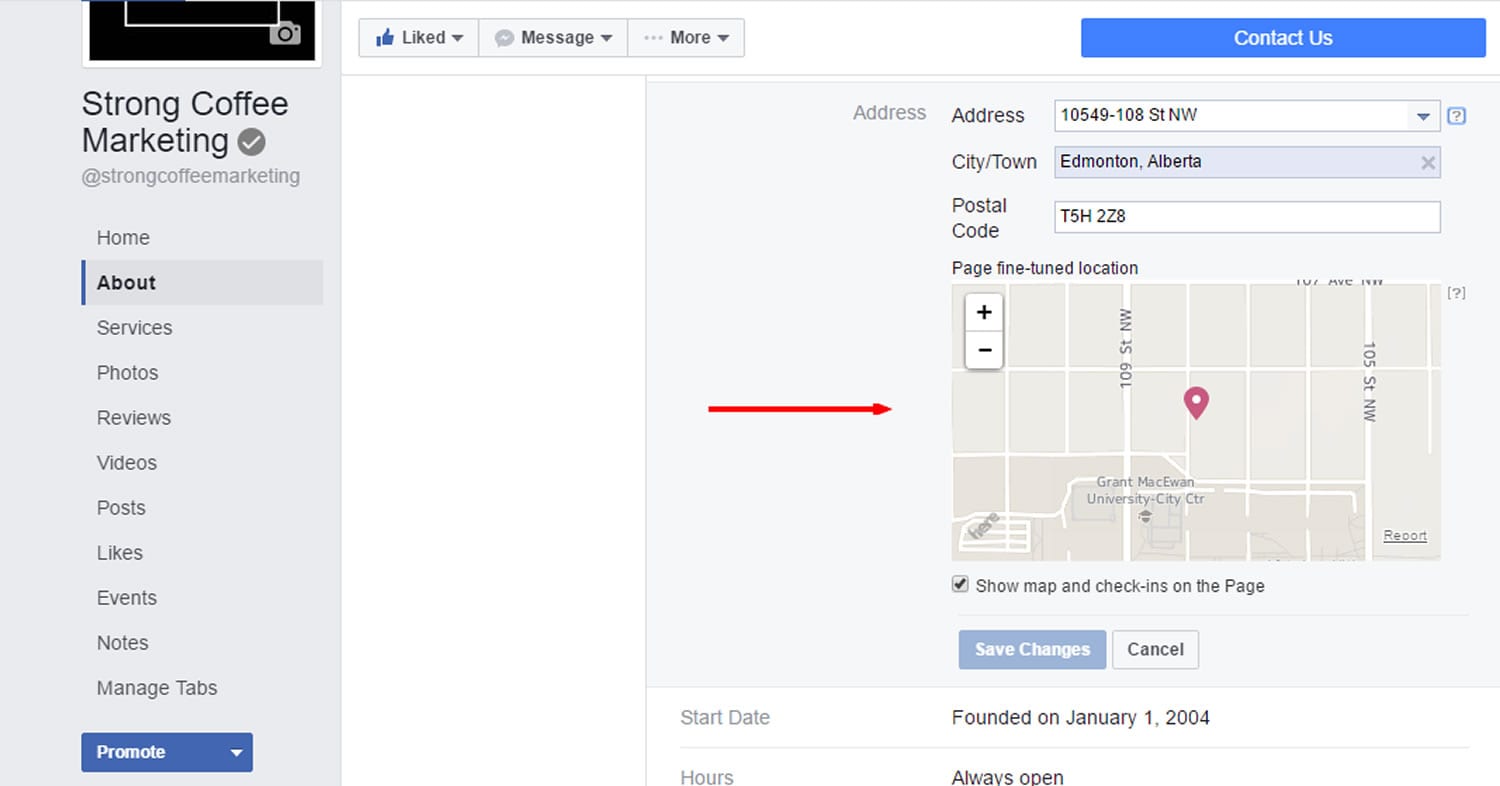
Now you’ll see the address and map again. Edit them both here and click “Save Changes”. Some people have claimed that they’ve had to also uncheck the “Show map and check-ins on the Page” box before saving the new location but I have never needed to.

Go check your map now. BOOM!
You’re welcome.
Recent Posts
Navigating the Digital Buying Cycle: Strategies for Modern Consumers
In today’s fast-paced world, where information is just a tap away, the buying cycle has transformed dramatically. Gone are the days when consumers...
Digital Marketing Strategies in the Off-Season
Ah, the off-season. For some businesses, it’s a time to kick back, relax, and sip on a well-deserved latte. For others, it’s a...
How ChatGPT is Transforming Online Search Behaviour
In the ever-evolving landscape of digital information, the way we search for answers is undergoing a seismic shift. We got used to searching...


